 This isn’t EXACTLY a post related directly to beer but I consider it beer-adjacent in my interests. I love beer, bourbon, bourbon barrel aged beers, I also love BBQ. For a long time I’ve had a fantasy of converting a used bourbon barrel into a meat smoker. An opportunity presented itself in the form of a cheap 2005 Buffalo Trace bourbon barrel used by Heavy Seas Brewery outside of Baltimore.
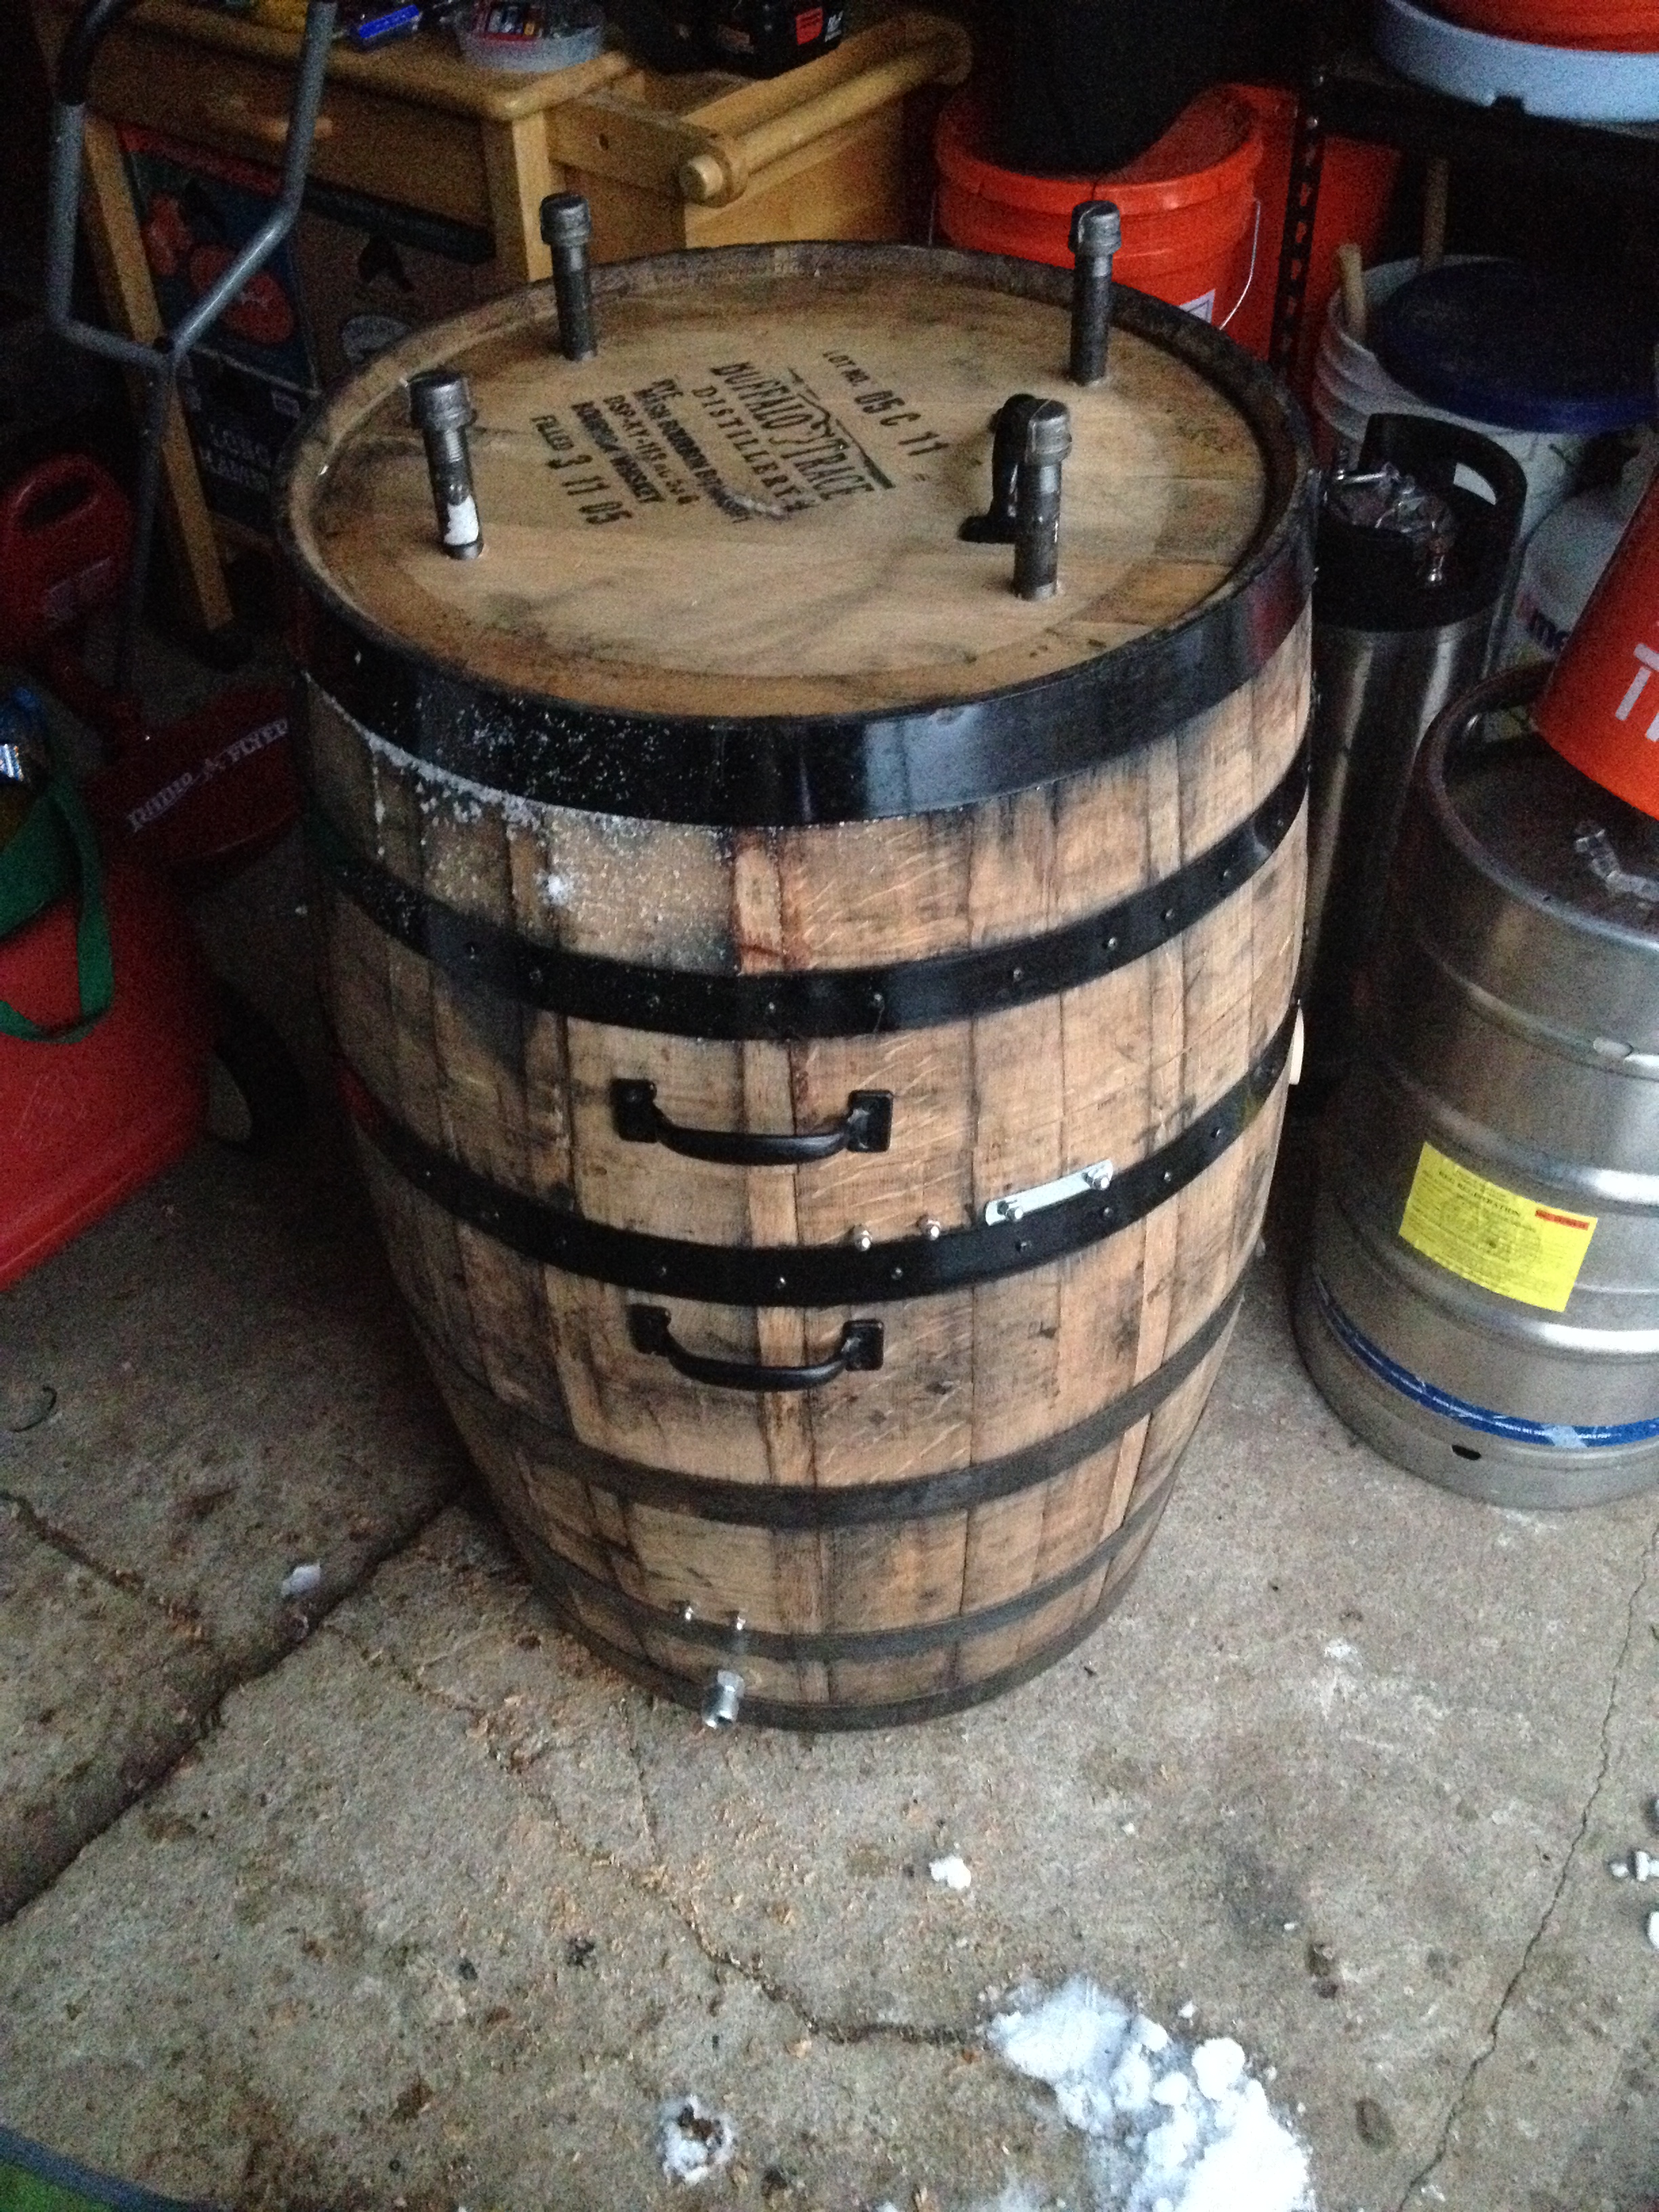
 I was able to scurry up to the brewery one morning and pick up the barrel for a mere $60….the modifications to the barrel itself ended up costing that much but in the end I have a hand made, custom smoker that accents my interests. It is a great conversation piece. This post is going to be a little photo heavy so bear with me. First thing, this barrel is heavy. I was able to pick it up and carry it but it weighs easily 80 pounds. I had to attach some casters to the bottom just so I could push it around. Casters are cheaper than a dolly for a barrel, which I also considered. These can pivot 360 degrees and have a brake. The screws that hold the casters on are not long enough to pierce the bottom of the barrel so it remains water tight.
The next step was to reinforce the staves by screwing through the hoops into each of the staves. Normally barrels are built without nails or screws but since this will no longer hold water to keep it swollen (and there will be a fire burning inside), the screws help stability. In addition, this will be cut in half and that will decrease structural integrity of the barrel. I used sheet metal screws and first drilled a small hole through the center of the ring in the center of each stave. The hole was smaller than the screw so it would catch well, again the screws were not long enough to go all the way through the stave. This took several hundred screws.

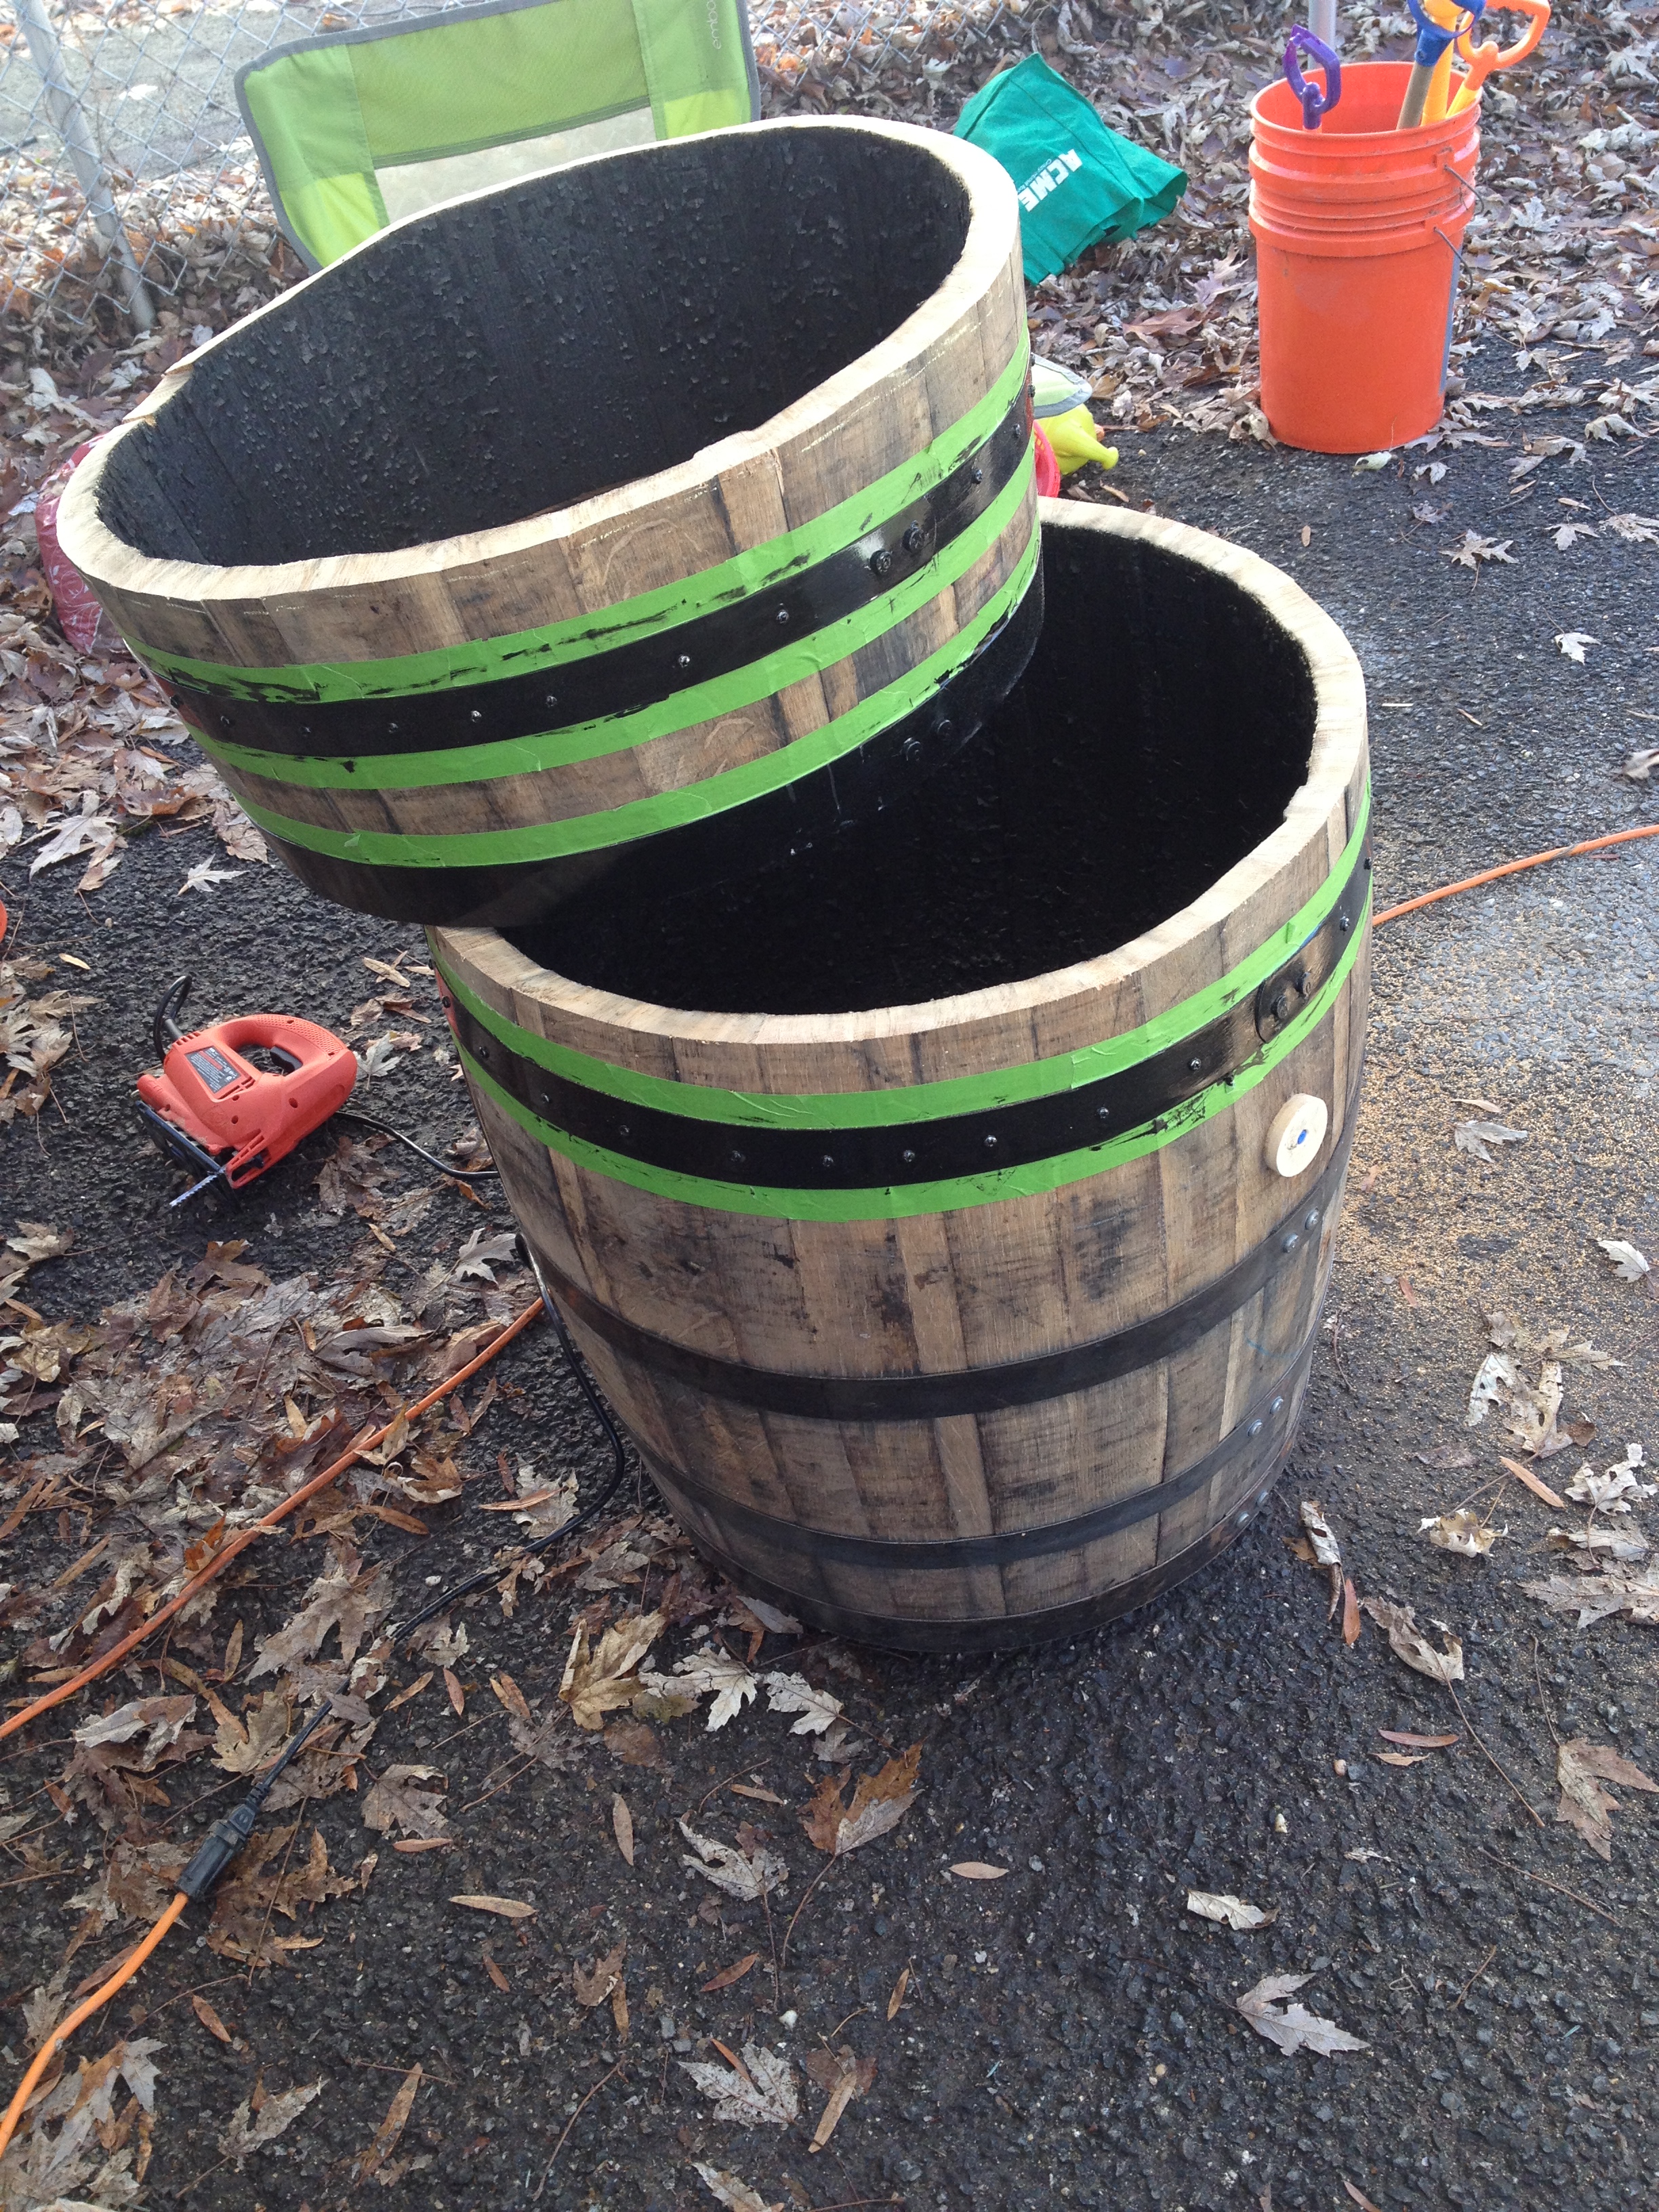
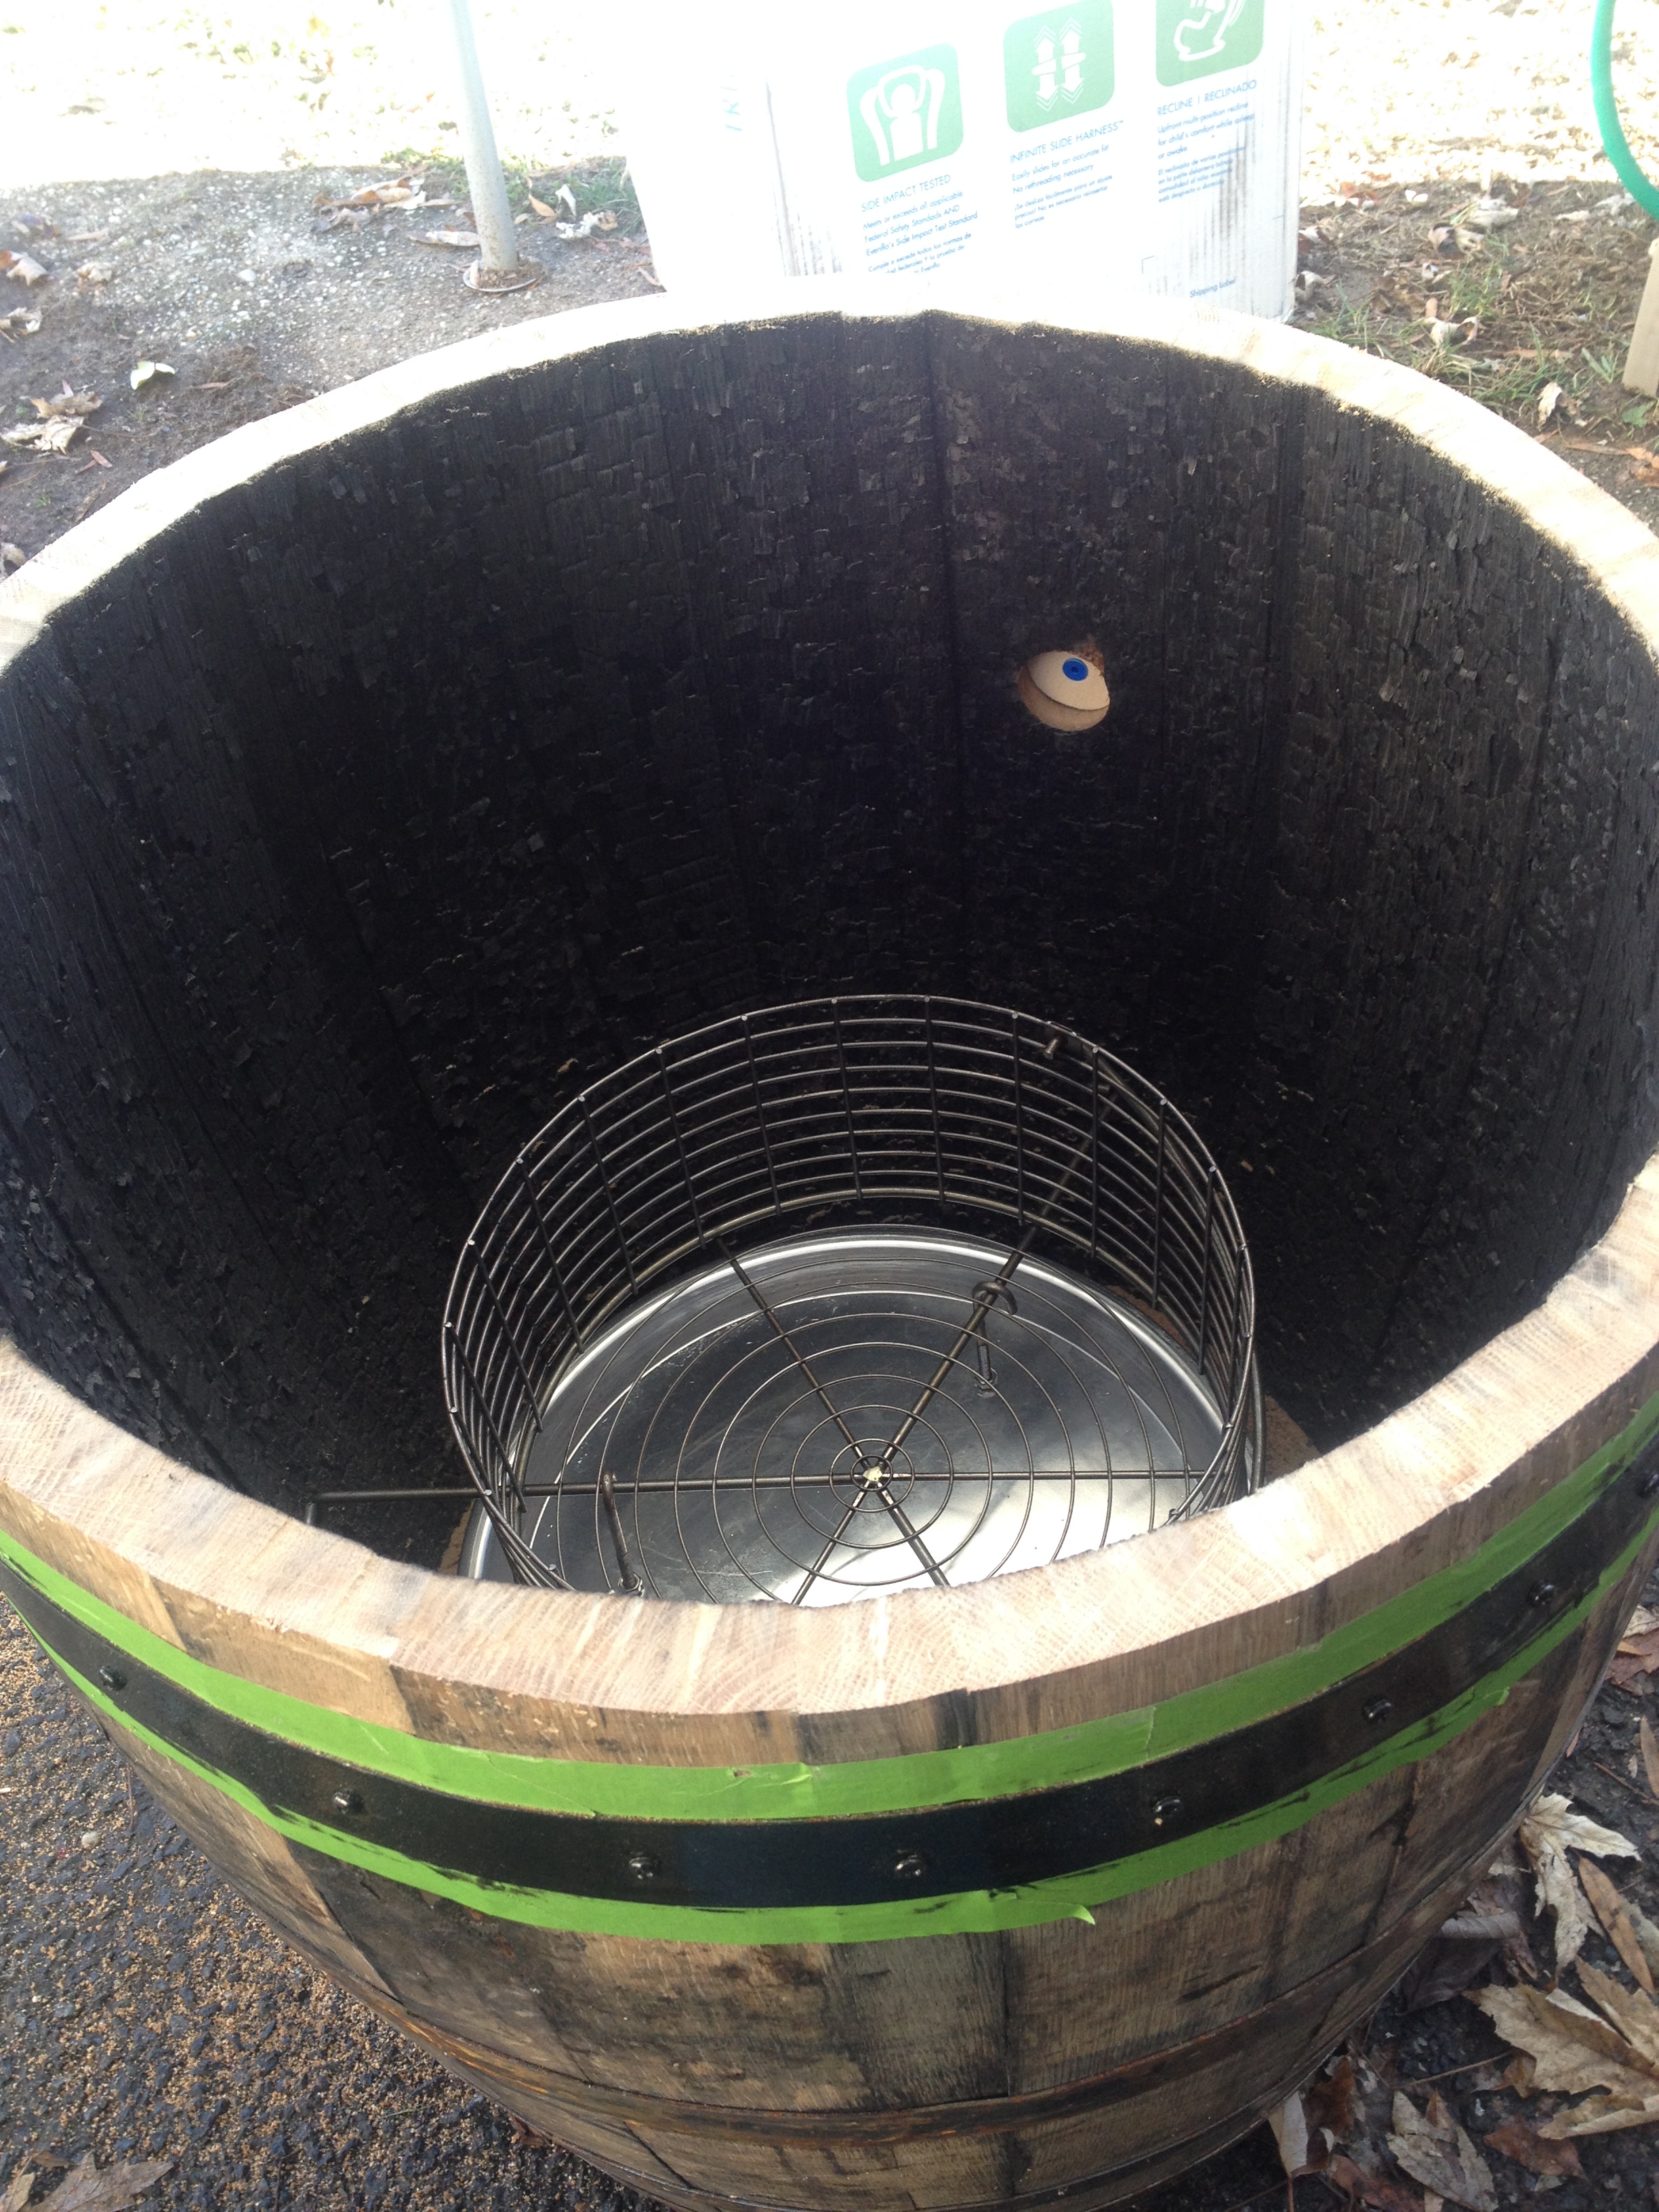
 This barrel was well used…and wasn’t cared for, there was some rust on the hoops and some minor damage to the wood. I painted the rings with a flat black rust-resistant paint. I marked with a piece of chalk a line (tried to make it straight but that was harder than I anticipated) between the quarter hoop and the bilge hoop. To get the cut going, I had to drill a small hole on the line so I could get the jigsaw bit to complete the cut. This was the most difficult part of this project. I did an OK to fair job with the cut (at least I wore safety googles). The barrel isn’t a flat surface and it is pretty hard to steer a jigsaw while holding it at a 90 angle. I ended up about 1/8th of an inch lower than where I started the cut (you may be able to see in the photo the small lip on the cut near the drilled hole). Regardless of this error, the cut was made and I didn’t ruin the whole project. The hardware consists of a charcaol nest with attached ash catcher (you can see in one of the photos above) and a 22 inch cooking grate (both purchased from Big Poppa Smokers). Both the basket and the grate are held in place by a few U-bolts that stick into the interior of the barrel. Inlet and exhaust holes were drilled into sides and top of the barrel to allow air in and smoke out. Three holes were drilled in the sides near the bottom of the barrel and four in the top of the lid. Short black cut steal (gas) pipes were screwed into the holes and end caps were used to control the rate of influx and exhaust.

TEST RUN! Don’t worry, this blog is not going to turn into the BBQ blog (I will make a BBQ sauce out of some beer later…spoiler alert) but since I went to the trouble of writing this post I figured I’d throw in some wonderful meat at the end. I decided the test run would be a pork loin cooked using apple wood. The loin was marinaded in garlic, olive oil, parsley and thyme. The only source of heat and smoke was apple wood chunks. The chunks were set on fire using my propane burner normally employed for my homebrewing (see any other post in this blog), I stacked the wood pieces in a pyramid once they were burning. I allowed a healthy fire to get going, then flattened the pyramid to a uniform layer and put the lid on the smoker. It quickly filled with smoke. The basket has a tray that hangs from it so any embers or ash that falls out of the basket end up on the tray, this will help protect the barrel from the fire itself, but in addition I added about 1.5 gallons of water to the barrel. The water is important to help protect the barrel from the fire and to provide a little steam / water vapor on the interior, when the lid is on. The lid is just placed on the top, there are no hinges just a couple of handles I added to make removing and replacing the top easier.
There were a few temperature control “problems” with this test run. It ran a little hot and I had a hard time getting the temp down, it was about 220° F in there at the highest but I kept it around 200° F…a little hotter than I wanted it. I do need a thermometer that can accurately measure the internal temperature of the barrel, an upgrade to come in the near future. The temperature problems are 100% a venting issue. I just need some experience with this barrel to figure out the proper amount of intake and exhaust for different temperatures. I turned the loin after about 1.5 hours and took and internal temperature, it was almost 150° F. I had to add wood to the fire after 3.5 hours (I wished it would have lasted longer but hopefully next time). After 4 hours the loin reached an internal temperature of 160° F, it was finished (above the USDA recommend internal temperature for pork, it was probably done at 150° F but I wanted that extra hour). The loin was moist, cooked all the way through but definitely not overcooked at all. The apple wood gave the meat a wonderful light smokey flavor, obvious it was a smoked meat, but it wasn’t campfire overwhelming sense. It made a nice meal for my wife and her sister. Overall, a B+, some improvements to come but this test run was great.
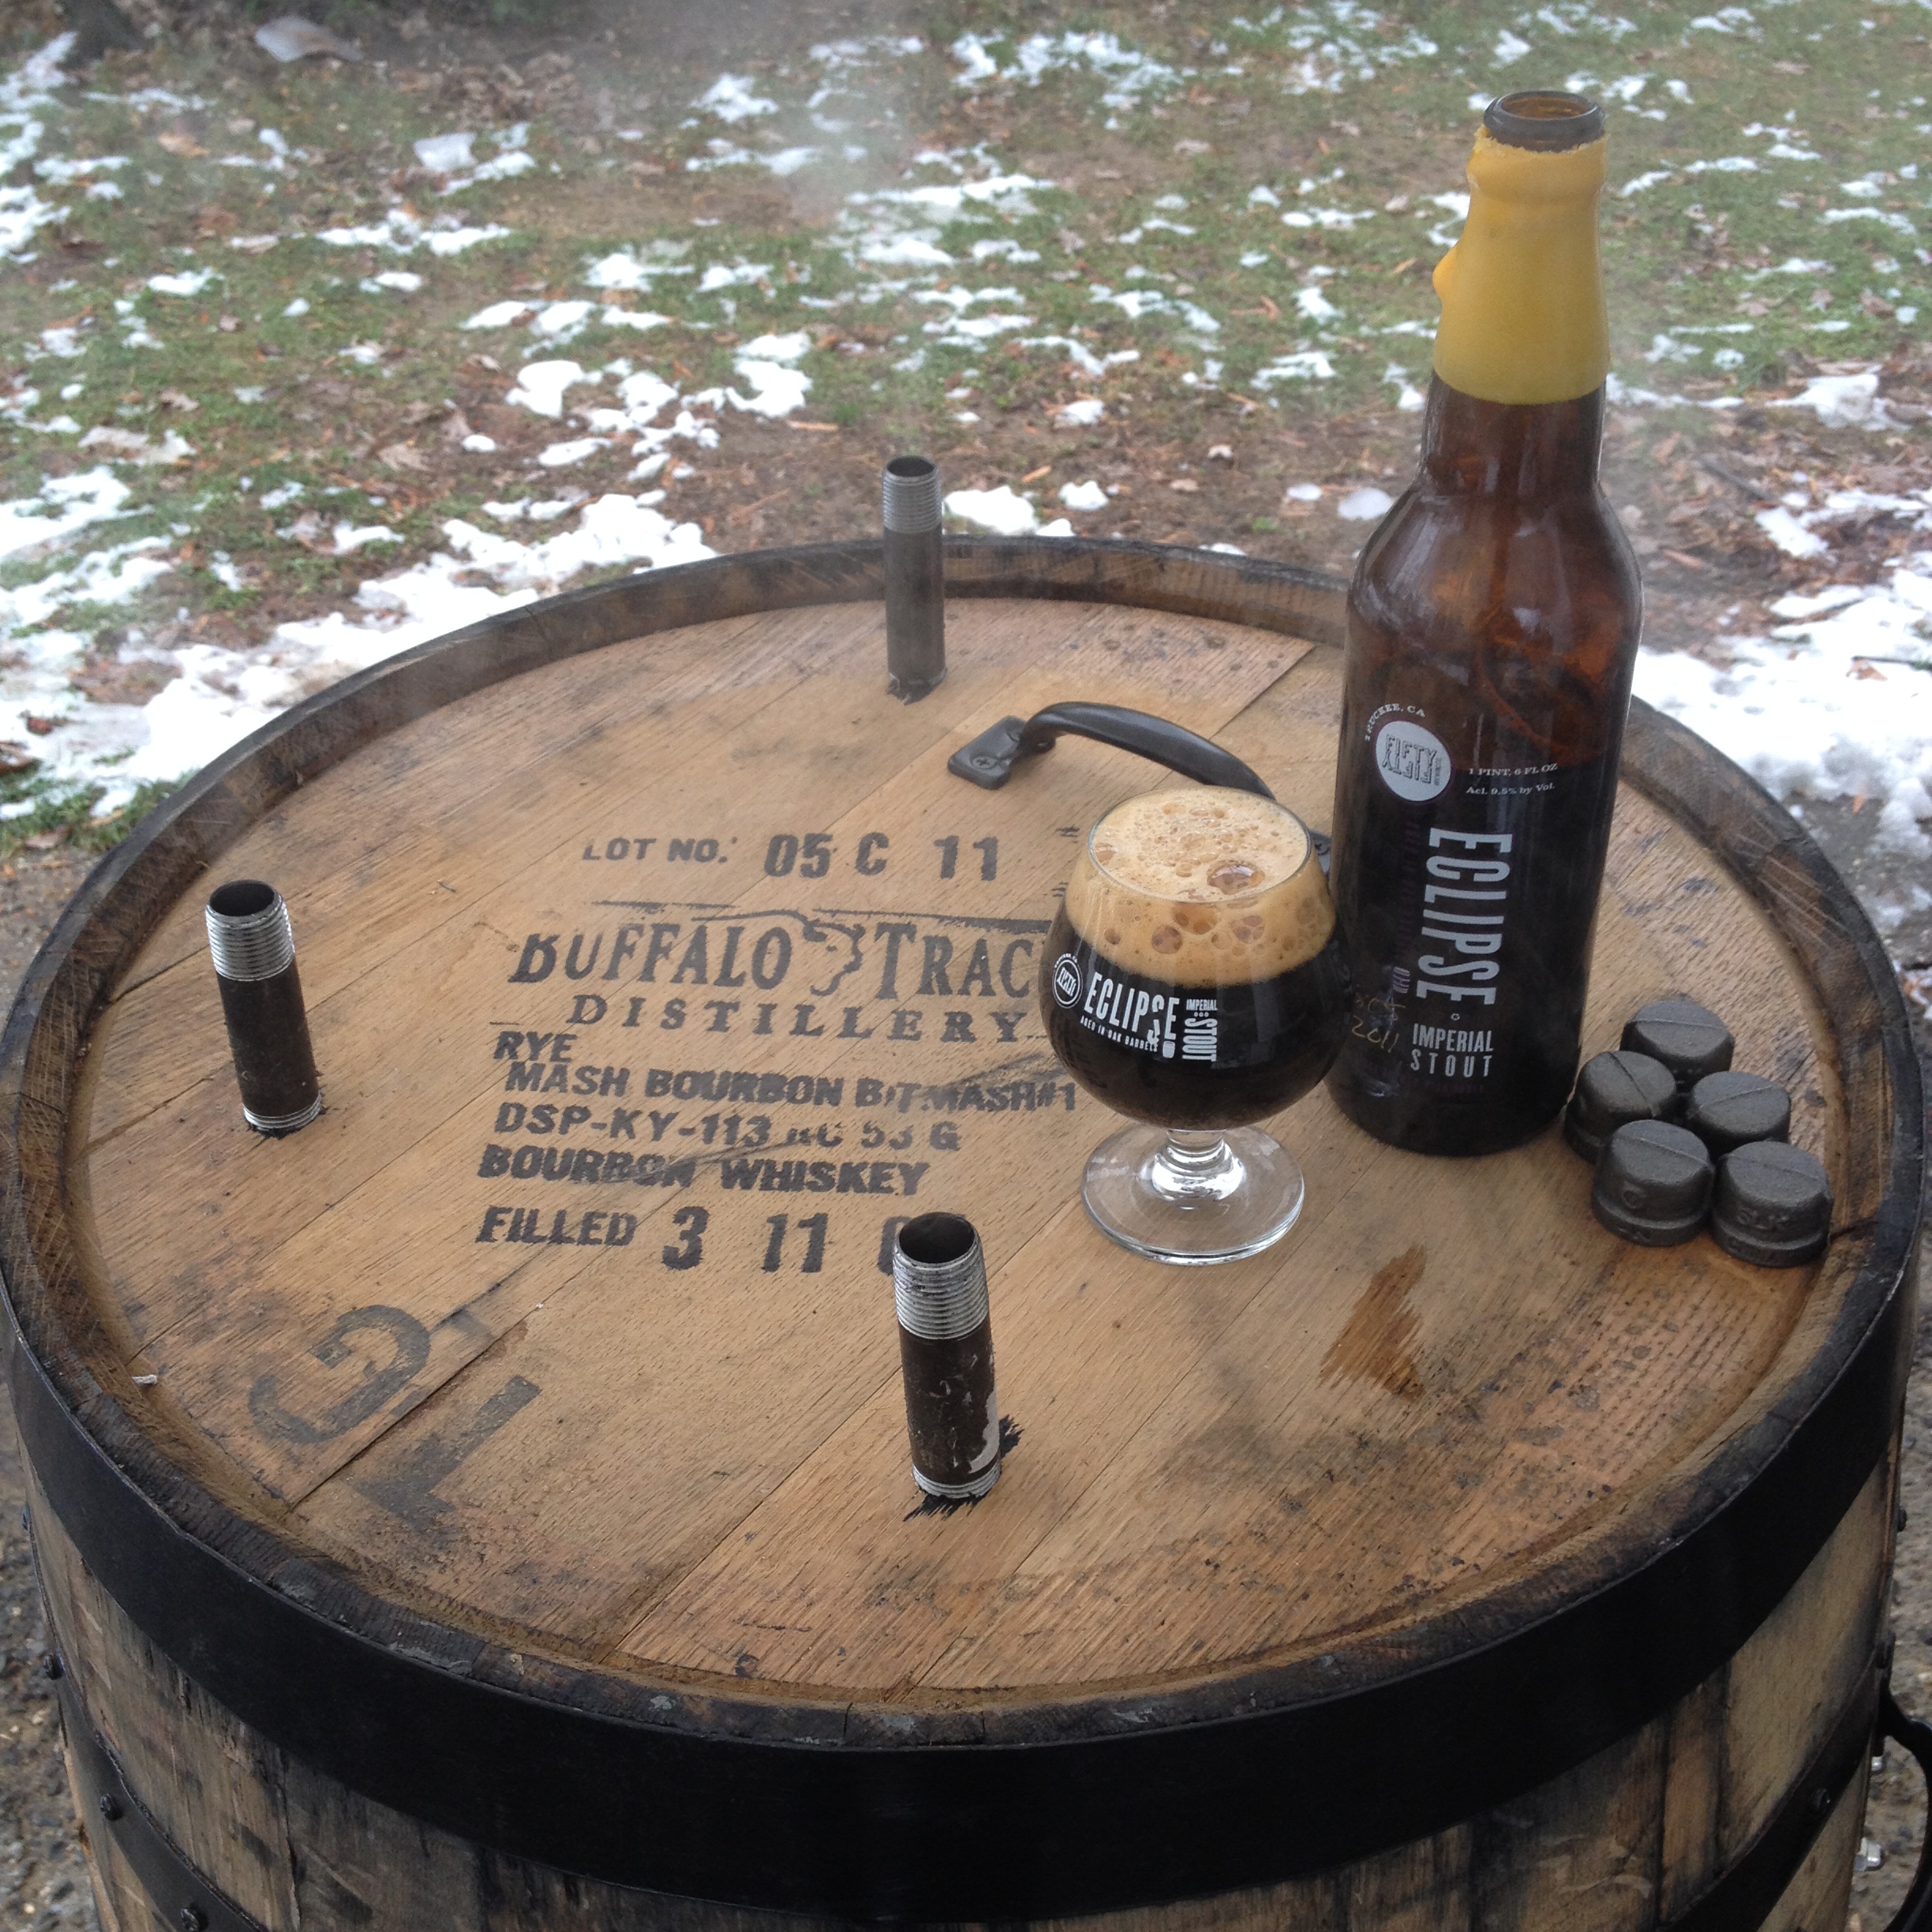
I, unfortunately, did not remember to take a photo of the meat, a huge oversight I realize. Below is a photo of the barrel (with a Buffalo Trace bourbon barrel aged Eclipse stout from FiftyFifty brewing in the proper glassware) and a short video of the smoker doing the job.
Possible improvements for future batches of meat? Well, I think getting the fire to last longer is going to be my primary focus. I’d like a 6 hour burn, perhaps more wood, changing the venting? I’ll experiment by making more smoked meats. Second, getting the temperature to be in a 160 – 180° F range would be nice for a slower, lower cook. But overall, I’m over the moon happy with this result. I look forward to smoked salmon, pork belly, ribs (I really want to do some ribs soon). Any suggestions of things to try would be great. Leave a comment or shoot me an email.
Possible improvements for a second barrel build? I think I did a decent job with the build. There are still a few improvements I can do to this particular barrel. I think the biggest thing was the cut between the quarter hoop and the bilge hoop. I needed a straight edge to guide me better. The U-bolts should be steel rather than zinc plated but I doubt that matters in the long run. There was also a slight measuring problem with the U-bolts that hold the charcoal basket in the bottom of the barrel. One of them was about 1/4 of the inch off so I had to bend one of the hooks on the side of the charcoal basket to fit in the hoop. Again, this is a cosmetic problem that only I would notice. I do want to build another one but I think I’ll wait until summer.
To bring this back to beer for a moment, I am planning on using this in 2014 to make some smoked malt for a few beers coming up. Special B smoked malt? Maybe a smoked Porter….Stay tuned for that.
“Too much of anything is bad, but too much good whiskey is barely enough.” ― Mark Twain

Now this is certainly interesting! I’ve been kind of hit and miss on the issue of bourbon barrel-aged beers, but smoked meat? That’s always in order!
Thanks! I picked up two more barrels from Heavy Seas and am going to build another one once the weather turns a little warmer. A fun build and you get to eat meat after.
Reblogged this on Things that Fizz & Stuff.
Nicely done. I’ll be doing the same as soon as we retire some barrels from the brewery. Have you heard of the Minion method for the coals? It should give you a longer burn and the idea is that it is pretty consistent during the entire cook.
Thanks. I’ve gotten considerably better at smoking on that thing. I’ll post an update when I get around to making some smoked malts. So, sometime this summer.
Nice to hear. I also am a big fan our the beer styles you going. I’ve been messing around with dry hopping Saisons (I call them Farmhouse Pale Ales) for a few years and really like the combo. My favorite combos have been a lot of Saaz with the Dupont strain, Amarillo with 3711, or Nelson with Brett Drie (Trois).
Beauty. Matt. That’s good work. A bit of a question, though. Are the galvanized/zinc plated u-bolts at ALL close enough to the charcoal to heat up? You don’t want ANY part of zinc fumes. Just google zinc poisoning…and switch to stainless u-bolts.
Thanks for the heads up. I did end up switching them out.
Will a hot plate and frying pan work ?